Monday, June 6, 2011

Lounge

Lounge, from north west

 Here is our lounge.  Again I'm thinking that some close-up detail photos could be helpful!  It's pretty difficult to capture the essence of a room in a photograph.

Some descriptions may help.  I'll do my best.  The floors are polished concrete, as in the rest of the house (except for the bedrooms).

The tv is set into the wall, but there are still a couple of tall black speakers on the ground.  The walls are wired for sound.  The actual speakers are just in the long-term plan.

Lounge, from north east
To the left of the second speaker, you can see our little Studio wood burner.  It is awesome!  It is clean-burning and pumps out so much heat!  It is all that we are using for heating at the moment, and it is doing that well. 

Next to the wood burner, you can see a low level fitting with a wooden-type top (it is actually clear-sealed MDF on concrete blocks!).  That holds the stereo, Sky box etc.  That fitting acts as a room divider, dividing the lounge from the library (fancy name for the space in front of the bookshelves!).

Lounge, looking out to the north west
The long, skinny window that you can see behind the old wooden chair to the left of the tv is in fact a door.  It is a 3.2m cavity slider.

You can just make out our lights in picture 2.  They're 1930s originals that we picked up one day a few years ago in an antique shop in poor old Christchurch and have been hanging onto since then.  

Lounge, taken from the window (and looking to the east)
At the window, you can see our black steel balustrades.  They are on the inside of the window.  The windows behind the balustrade slide open, ie. they slide right open and stack behind the sheet of glass on the far right (which doesn't have a balustrade in front of it).  This area is pretty windy (no view without wind) and so having a balcony seemed pretty pointless.  Why bother when your whole lounge can be a balcony/deck?

We do have blinds - they are rolled in behind a pelmet on the straight line of the aluminium window frames so that they disappear when they are up.  Apparently it is the first time that Window Treatments has tried that method in Dunedin.  They're sunshade blinds so that we can let the light in, but shield our eyes and furniture when the gorgeous westerly sun gets too much for us.

Our Lundia shelves have fitted beautifully into the macrocarpa wall.  That wall continues through the house, splitting the living block and the sleeping block.  It also continues through from exterior to interior - you can see it continuing through to the outside past the 3.2 m window.  It is our storage wall.  Aside from the library shelves, it has also got various cupboards in it.  And the library shelves also house the cat's bed!  Nice and secure for her, and a good platform to smack Frank's nose from when he gets too curious.

There's also a small triangular window above the shelves, which lets light through into the hallway.

I am definitely loving having a separate lounge.  We've got two sliding doors on the northern wall, which separate it off from the stairwell and then the kitchen/dining.  It means that the room is lovely and snug.  And you have to make a real choice about which room you're in.  Not putting the lounge on the north face was controversial, but I still think it makes sense.  Realistically, we only want to use it in the afternoons.  There's plenty of space for us to enjoy morning sun in the kitchen/dining area, and I'd rather eat my breakfast in the sun!

Sunday, May 29, 2011

Bedroom 3

From the doorway
Bedroom 3 is my new favourite room.  It faces north, and so it is bathed in sunshine from early in the day and, as we have discovered, it is the perfect spot for a cat nap.

Our intention is to use that room as an office, which is why we've got a fluorescent light in it.  But with my parents and sister and brother-in-law coming down last week-end, we needed beds and so the Bedroom 2 bed is in there temporarily.  Which is how we discovered that it is perfect to use as a day bed.  It is certainly Zaha's favourite spot!  And the cat's.

A cupboard will eventually enclose the space where the bookshelf is currently standing.

The only issue is that the sun made photographs a little difficult.
From the window/sliding door

Wednesday, May 25, 2011

Bathroom

The bathroom is pretty much complete.  I think all that needs to be done is to put up a rail for the hand towel.

Yes, that is an exterior door.  The idea is that if you have been working in the man cave downstairs (just for example) or in the garden and are covered in dirt, you don't need to traipse it all through the house. 

The area on the right of the photo is the wet area and is all tiled.  The Tiler (Regan) has spent ages getting it all perfect.  The drain in the shower is that channel up against the wall.  I really, really hate it when you end up standing in a deep puddle of water, on top of the drain.  Eugh.

The other pet hate that this bathroom has dealt with is the position of the shower mixer.  It is definitely not next to the shower head.  I detest having to get frozen or scalded while I try to get the temperature right.  And so in this shower, I don't.
The bath end of the wet area

The rack that Regan found to hold the shampoo etc is really cool.  It is so thin that it just seems to float. I probably need to do a post just on the details...  Some of you will care!

We've had a couple of minor crises.  The bath was cracked when they went to put it in!  Argh.  So now although it is sitting there and looking pretty, I can't even use it!  I got a bath bomb for my birthday and have been staring at it, planning with glee my first soak, lying there with the door open and looking at the stars.  But not yet, as it turns out.

The basin is also cracked!  It is probably one of the cheapest things in the house, so we'll just deal with it.

Now that the bath is in (albeit just floating), we've also realised that the mixer is just too small.  Another job for another day.

In the photo of the bath, you can just see the macrocarpa wall peeking out from the hallway.

The joinery unit
The Builder made us a beautiful joinery unit, which also has a lacquered front.  This front matches the drawer front in the laundry too, so that colour continues through the house.

It's a bit difficult to see with all the reflection in the photos, but the walls are white.  The tiles aren't white.  They've got a light stripe in them.  Again with the close up detail photos...

And the water pressure is amazing!  Much time has been lost in here already.

Sunday, May 22, 2011

Laundry

Here's the laundry, as is for the moment.  It's got the same polished concrete floors as the rest of the house, with an external door for the all-important easy access to the washing line.  When we get one.

The builder/joiner has made us a plywood and green lacquered laundry tub, which matches the one in the main bathroom.  It's got a lovely big pull out drawer at the bottom.  Having used drawers now for a few weeks, I can happily report that drawers are where it is at.  You can actually get to the things at the back!

You can still see the ducting above the dryer.  We (the royal "we", of course) still need to get a cupboard sorted to hide all of that.

Then next to that, you can see some of our old white formica cupboards from the old place.  We've got another one in the alcove that you can just see peeping out to the right of the photograph.  Those are temporary for the next couple of years probably.  You can see I've got a couple of Trade Aid baskets sitting on one of them.  Long term, I'd like to have some shelves up with about six of those baskets so that I can sort towels, sheets, delicates, whites etc into baskets as I go.
Close up of the laundry tub

We also need to think about exactly where the ironing board will go.  And of course where the airing rack will go!  That's a bit of a necessity for a working couple in the Dunedin winter.  I think I'd love some of those fold-down racks that live on teh wall.  But I just need to think a bit more about how  I want those bits to work.

We've also got a big broom cupboard-type cupboard behind the door to the left of the photo.  It opens up facing that cupboard on the left.  That gives us more storage, which is great.

Our newest neighbour
I am totally loving having a laundry!  Every time I have something that I don't know where to put (eg. spare light bulbs), I don't have to try to shove it into the kitchen - I can just put it in the laundry.  Bliss!

The farmer in the paddock behind us has mown his hay and now put his steer calves into the paddock, so we've had some very curious cows watching our every move.  We had a competition to see who could get the biggest bovine audience for their shower...

Monday, May 16, 2011

We're in!

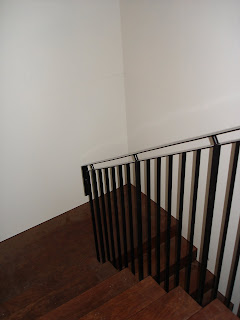
Stairwell with steel balustrades by day
We moved in over Easter week-end - to only a semi-finished house.  It has been chaotic and messy, but we're glad to be in.  I'll just tease you with some bits and pieces in photos.

The place was a hive of activity on Easter Thursday, as workmen hurried to finish off the last necesseties - like blinds.  The perils of living in a house with lots of glass walls...  And polishing the floor so that we could actually walk on it.

So we were semi-camping for a while.  Every day we have more and more lights.  Mood lighting is good.  We have, however, lost one of the key wires in the wall in the living room.  So the Sparkies have been "fishing" for it.  It means that we only have two small spotlights for light, and the tv is running off an extension cord instead of being tidily tucked up in the wall.  It is amazing how small the tv looks in the wall!

Stairwell by night - thanks to Moooi random light
We didn't have a shower for about a week while The Tiler (Regan) was tiling his little behind off.  He's done an amazing job and the shower is a great time-waster.  Fantastic water pressure! But when they went to put the bath in, they found it was cracked.  And the hand basin in the main bathroom is cracked too.  So there is some stuff to sort out there.  And Regan's reward for finishing the tiling of the main bathroom is to tile the en-suite...

The balustrades have gone in too.  The stairwell was done by the time we moved in, but the ones over the windows have only just gone in.  They're the same as the ones down the stairwell.  But one of our neighbours was around the other day and managed to break one!  Whoops...

Another issue that we've encountered is that it seems that the seal on the floor wasn't quite set when we moved in.  Or maybe it just isn't as hard as we expected it would be.  So we are picking up heaps of scrapes.  It's not helped either by all the grit on the ground outside and the dogs.  Frank just seems to have pouches between his paw pads that trap grit and drag them in!  We've had a bit of site work done too, so the levels around the exterior doors at the back have been brought upwards so that the courtyard is more formed.

Tiling on the go
The Head Sparky puts in another light
We've had more joinery arrive too, so every few days I get to unpack more drawers, which is exciting too.  I am totally excited about having a laundry.  I was shoving everything into the kitchen out of habit until I had an epiphany and realised that I had a whole room that could take things like rubbish bags and pegs and cleaning stuff!  And as for the dishwasher....  Our little studio fire is incredible too!

So I'll try to do more updates about specific areas as they get finished off and look better.   But it is great to be in!

Sunday, April 10, 2011

Kitchen benches in & a bit of a photo bonanza

The kitchen benches are in!  They both have steel frames - I put up photos of the frames a few weeks ago.  The frames taper and merge in with the white formica benchtops.  The drawers at the bottom area matt black Melteca.  With the handles that we have used, they look a little like filing cabinets to me (in a cool way, of course!).  The tall cupboards at the back by the pantry and oven will have white lacquered doors in the same colour as the walls.

Poor Troy arrived for a visit and found himself lugging the fridge/freezer from the barn into the new house in the pouring rain...

The fridge is christened.
So that is now in too, and Regan FINALLY has his beer fridge.

Back to the first photo... The benches are each 3.2 metres long, and are higher than normal so that I don't end up hunching over (particularly when doing the dishes) and hurting my poor back.    The bench on the left has the cooktop set in steel at a lower level than the white formica benchtop (which has the sink in it), so that the pots aren't too high to see into.

The steel is raw black steel that has been powdercoated, so close up you can see all the patterns and marks in it.  We'll have to post some photos of that once everything is not covered in this infernal dust!

The bench on the left is the working bench.  It has the sink and stove in it, and the dishwasher under it.


The bench on the right (which is the harbour side), is the food preparation bench, and has a small sink in it for washing food as I hate washing my lettuce in the same sink that has had my greasy pots in it.  Irrational?  Yes.  Irrationality catered for by my architect as per brief?  Yes.

Taken from the hallway
The gap at the end of the bench on the right will eventually harbour some sort of butchers' block-type unit with a marble top for pastry preparation.  That is in the long term plans.

The first gap on the bench on the left is for the dishwasher.  The gap at the other end (closes to the pantry) is for a planned contrivance to house the pots.  The plan is currently there, but the budget is not willing.  We have enough drawers for the moment anyway...

Taken from the dining room
You can also see from the bench on the right that the drawers aren't actually the full width of the benchtop.  It is the same on both benches.  Eventually (we're all about the long term) we will put shelves or something on those sides.

My parents clearing the floors
A Concrete Man is coming this week to grind a few imperfections in the floor, and then, finally, to seal it!  So we had to take up the cardboard from all of the concrete-only parts, and then sweep it and vacuum it.  My parents were here for a quake-relief visit, and so they were immediately put to work cleaning up our house instead of theirs.  The amount of dust in that place is phenomenal!  I don't know how we will ever get rid of it.

Regan is working on getting the showers waterproofed this week-end, as the Council is signing them off on Monday.  Tiling can then begin.  Once we have a working bathroom, I reckon it's all on...

Now for some gratuitous shots:


And these shots of Regan putting together the black plywood David Trubridge light are especially for Bridget D ;-)


Sunday, April 3, 2011

Kitchen begins

The start of the kitchen (sans doors)
The kitchen has started going in!  The first time that I saw it, the doors were on, but they have since been taken away to be painted.  The pantry is on the left, and will be covered by two bi-fold doors.  The oven and speed cook oven are in the middle (covered in blue protective film while Regan is painting the ceiling), with cupboards above and below them.  The slots immediately above the ovens are for platters, although we do wonder if the builder has made that cupboard too shallow.  And then the last gap is for the fridge.  Ah, the bliss of having a fridge that does not ice up at the back!

One bag of floor screed applied to the shower
Regan has obviously been doing more painting (as you can see in the photo, in his dead sexy overalls).  He had a break from the painting during the week (hi Jo, Martyn & Abigail!) and had intended to extend the break this week-end and do some work on the bathrooms.  He squared up the shower bases and mixed his bag of floor screed and started to apply it to the main bathroom - but then discovered that he needed WAY more than the one bag that he was told he needed.  And the only shop in Dunedin that seems to stock that particular brand was closed for the week-end by 3 pm on Saturday!  So it was back to the painting for him.

The plumbers have also been in and installed the fireplace and its assorted bits and bobs.  We've chosen a nice little studio burner, which will hopefully be enough to keep us warm.

Of course, it's not a gyrofocus, but it's quite cute.

Meanwhile Dog Named For an Architect #2 (Frank) is sick, which has been a distraction for us.  He has been poorly enough that he could barely rouse himself to chew offcuts of wood that he shouldn't chew.  Hopefully he is on the mend now.

Sunday, March 27, 2011

More exterior photos

It's a little difficult to quantify what has been done over the last week, so I thought I'd mostly just put up some old photos of the exterior as it has occurred to me that there are not actually that many on here!  I think that we took so many that I felt as thought I'd posted a lot.

Regan has continued with the never-ending task of painting.  He's almost been doing it for three months now. He's on to the ceiling of the kitchen/dining room now.  I brought down the coffee after he'd been sanding for the morning and those bits of his face that had not been covered by the air filter were covered in dust.  The first top coat is on now, which is great.  He's also primed Bedroom 2.  Slowly but surely, we're getting there.

The kitchen has not gone in yet.  Somehow I'm not surprised.  But the Builder is working hard at it.  Maybe next week...

My contribution: lunch prepared on site
The builder has also been putting in more of the doors in the storage wall, so that is looking more like a continuous wall now, as it is meant to.  He's also been doing general finishing work, which is always difficult to describe.  It is all feeling very near but very far at the moment!

Tuesday, March 22, 2011

Stairs in

Main staircase, plywood
Painting continues...  Regan has actually taken some time off work, so he has progressed the painting quite a bit.  Unfortunately he is also sick, so he's probably not doing himself too much good.  He's completed the main stairwell now, which is looking pretty damn awesome.

He's also started sealing the ensuite, which is another milestone for us.  I thought that the sealing work would be a nice break from the painting.  I didn't realise that the sealant is all painted on...

The Builder has done a little more work on the macrocarpa storage wall.  He's cut out some MDF doors and is working on affixing the macrocarpa boards to that.  He's got the boards aligned practically perfectly - you can barely notice that there are any doors at all!

Spot the door in the macrocarpa wall?
The Builder has been spending most of his time away from site because he's working on the kitchen.  This is hugely exciting.  It has however lead to another Thing That Went Wrong.  Our gorgeous new microwave/convection oven was being moved to facilitate some measuring and the ceramic plate that sits in it got broken.  I haven't had the strength to price a replacement yet... Or risk being told that it will take six months to get the replacement part!

The metal frames for the two benches have arrived from the metalwork shop and are sitting in the dining room, waiting to have the formica cupboards (with soft close drawers - it came in on budget!) put into them.  They are very industrial looking.  They will probably need to be given all the parties that we're planning!

Toe board for a future kitchen bench
The Builder has also delivered one of the toe boards for one of the benches (for the non-kiwis:  the "bench" of cupboards.  NOT a bench that you sit on).  In the photo, the toe board is roughly in place.  There will also be another bench parallel to that one (about where the orange chairs are).  The fridge, oven, microwave and pantry will go in that cupboard space perpendicular to the benches.  The first installation of cupboards may even start this week.

Metal frames for the kitchen benches

Wednesday, March 16, 2011

A post in which things go wrong

The staircase & entrance hall
We have been a little distracted, dealing with post-CHCH earthquake issues.  And Regan has been sick, so he has done very little work.  And Things Have Gone Wrong.  In the end, there has been nothing that could not be fixed but they did feel a little major at the time.

Regan called on the day of the earthquake to say that when the carpet layer was fixing the carpets (which could now be done as the little stairs were in), he managed to drive a nail through the underfloor heating system.  WHOOPS.  That had the potential to render the underfloor heating for that zone unuseable.  Luckily however the engineer came up with a solution.  They have managed to chip out the concrete around that part of the pipe and apply a patch.  This does mean, however, that we currently have a large hole in the floor and exposed pipes.  It will get fixed though.

Timber reveal on the doors
The big staircase has also gone in, which means that we can actually use our front door now.  The staircase is made of the same plywood that the little stairs are made out of.  They have had one coat of the three coats of varnish applied.  They look somewhat odd in the photo as they have had cardboard treads put on them to protect them while we are still in the building phase.  So they are the colour that you can see on the left of each stair, and there will not be any weird cardboard tread on the centre (or off-centre, as the case may be) when the place is complete!  There will also be a black steel balustrade, as the health and safety regulations don't allow otherwise.  And truthfully, that void at the top of the stairs does get a little frightening!
Macrocarpa wall, near Master Bedroom

And that brings us to the second Thing That Went Wrong.  Once the stairs went in, The Architect and The Builder realised that the door had been manufactured slightly bigger than it was meant to be.  Which meant that the door, when opened, was butting into the staircase.  One minor redesign later...

Official bog inspection
The Builder has also been doing lots of little jobs, like putting in the window and door reveals.  The Architect has decided to put in door reveals that are made of the same timber as the staircase.  So when you step inside, you step onto wood and then on to the concrete.
All of the macrocarpa walls are now complete, and it appears that the timber matches.  So another worry can be crossed off the list.  The final part of the internal wall was the section up the small set of stairs and next to the master bedroom.  It has a low level window, which is set off beautifully by the timber.  Bedroom Two is opposite this wall, and so when its door is open, you can look from the back of the house, through the hallway and out through the front of the house.
Looking out from our bedroom

Why you should not sleep in sawdust if you have a beard
We also now have a working toilet!  It has been installed in the main bathroom.  I think that the rest of the plumbing will only be connected once the Plumber's Apprentice (Regan) and the Tiler (Regan) have sealed the showers and tiled the bathrooms.  No pressure on Regan.

Our permanent electricity supply has also now been connected.  The Master Sparky has connected one electrical socket, so we no longer have to run an extension cord through the storage room door and up the stairwell and pray that a strong wind does not cut the cord in two!
Work has also been continuing on the house in front of us, and we are thrilled that they do not take any of our view!

Thursday, February 24, 2011

Little staircase in

I won't even try to deal with the Christchurch earthquake.  I'll just say that thankfully my family is okay, and it appears that all of our friends are okay too.
The new stairs

On a more mundane note, our work has continued.  The little staircase that steps up the lower bedroom level to the upper bedroom level has gone in, so we don't have to balance on a plank anymore.  The stairs are made out of dark plywood, and I think that the Architect plans to have them stained a reddy/brown.

Macrocarpa wall under carport
The builder used up the last of the macrocarpa that we had to hand on the exterior of the building, putting it up under the carport (he had set aside all the better stuff to use inside).  As you can see, we were just a few planks short!  It sounds as though we've managed to source some more macrocarpa now, so hopefully it won't take too long to get that moving again.

The photograph of the exterior macrocarpa wall is taken from the north end of the house - the dining room is immediately above the carport.  The block that the front door stands in is immediately behind the macrocarpa wall that you can see.
Lounge wall

I've also added another photo of the completed lounge wall, which is at the south end of the house, ie. the opposite end of the dining room block, behind the macrocarpa block that you can see.

Saturday, February 19, 2011

More photos of that macrocarpa wall

Dining room/kitchen windows facing east/paddock
My busy week is over, so I have a little more time to blog.  I think the pictures really tell the story now with this macrocarpa wall.  Our only current issue is that we've run out of macrocarpa!  So I don't know how long that is going to take to sort out.

Apparently The Architect has finished the kitchen design.  The Builder appeared to consider it do-able, so now we just have to wait for the price...

The bath framing has also gone in, which means that that room now looks less like a small box.

Macro wall continuing through
So, photo narrative:  The first photo is taking from the dining room looking into the kitchen area.  This is the start of the internal/external macrocarpa wall.  After the big square window, the next gap is the door for the hallway.  The macrocarpa wall continues in a straight line after that doorway (although it is a little hard to see in the photo).

The second photo was taken by opening the sliding door to the left in the first photo.  Hopefully that gives you an idea of the thickness of the wall.  It has that thickness all the way through.  Again, hopefully you can see that the line of the wall continues straight through into the lounge and out the door at the end of the lounge towards the master bedroom.
Bookshelf in library/lounge

The third photo is taken in the lounge, and you can see that the wall continues out through the door at the right of the photograph.  The big gap in the wall is because that is where our bookshelf will go.  The finishing work that the Builder has done on the corners of that bookshelf and also on the doorway in the hallway is amazing.  It is the work of a craftsman.
Hallway


The fourth photograph shows the other side of the wall (ie. opposite side to lounge), in the hallway.  The first gap in the wall will allow us to see through into the stairwell area.  The second gap is for a cupboard.  At the top of the hallway, the wall has not yet been finished.  Hence the issue with running out of macrocarpa....

Close up of doorway into hall
The fifth photograph is simply a close up photograph showing the amazing mitre (correct terminology?  No doubt I'll be told!) work that the Builder has done in places like the doorway and the library shelving.  It actually looks as though he has folded the wood rather than using two separate pieces.

Bath in situ in bathroom
Lastly there is a photograph of the bathroom with the bath all framed in.  The unpainted parts will be tiled.  The macrocarpa wall will, I think, create a good contrast to the white walls and the tiles and give it all a bit more texture.

I hope that this gives a little more context to my last photo dump!